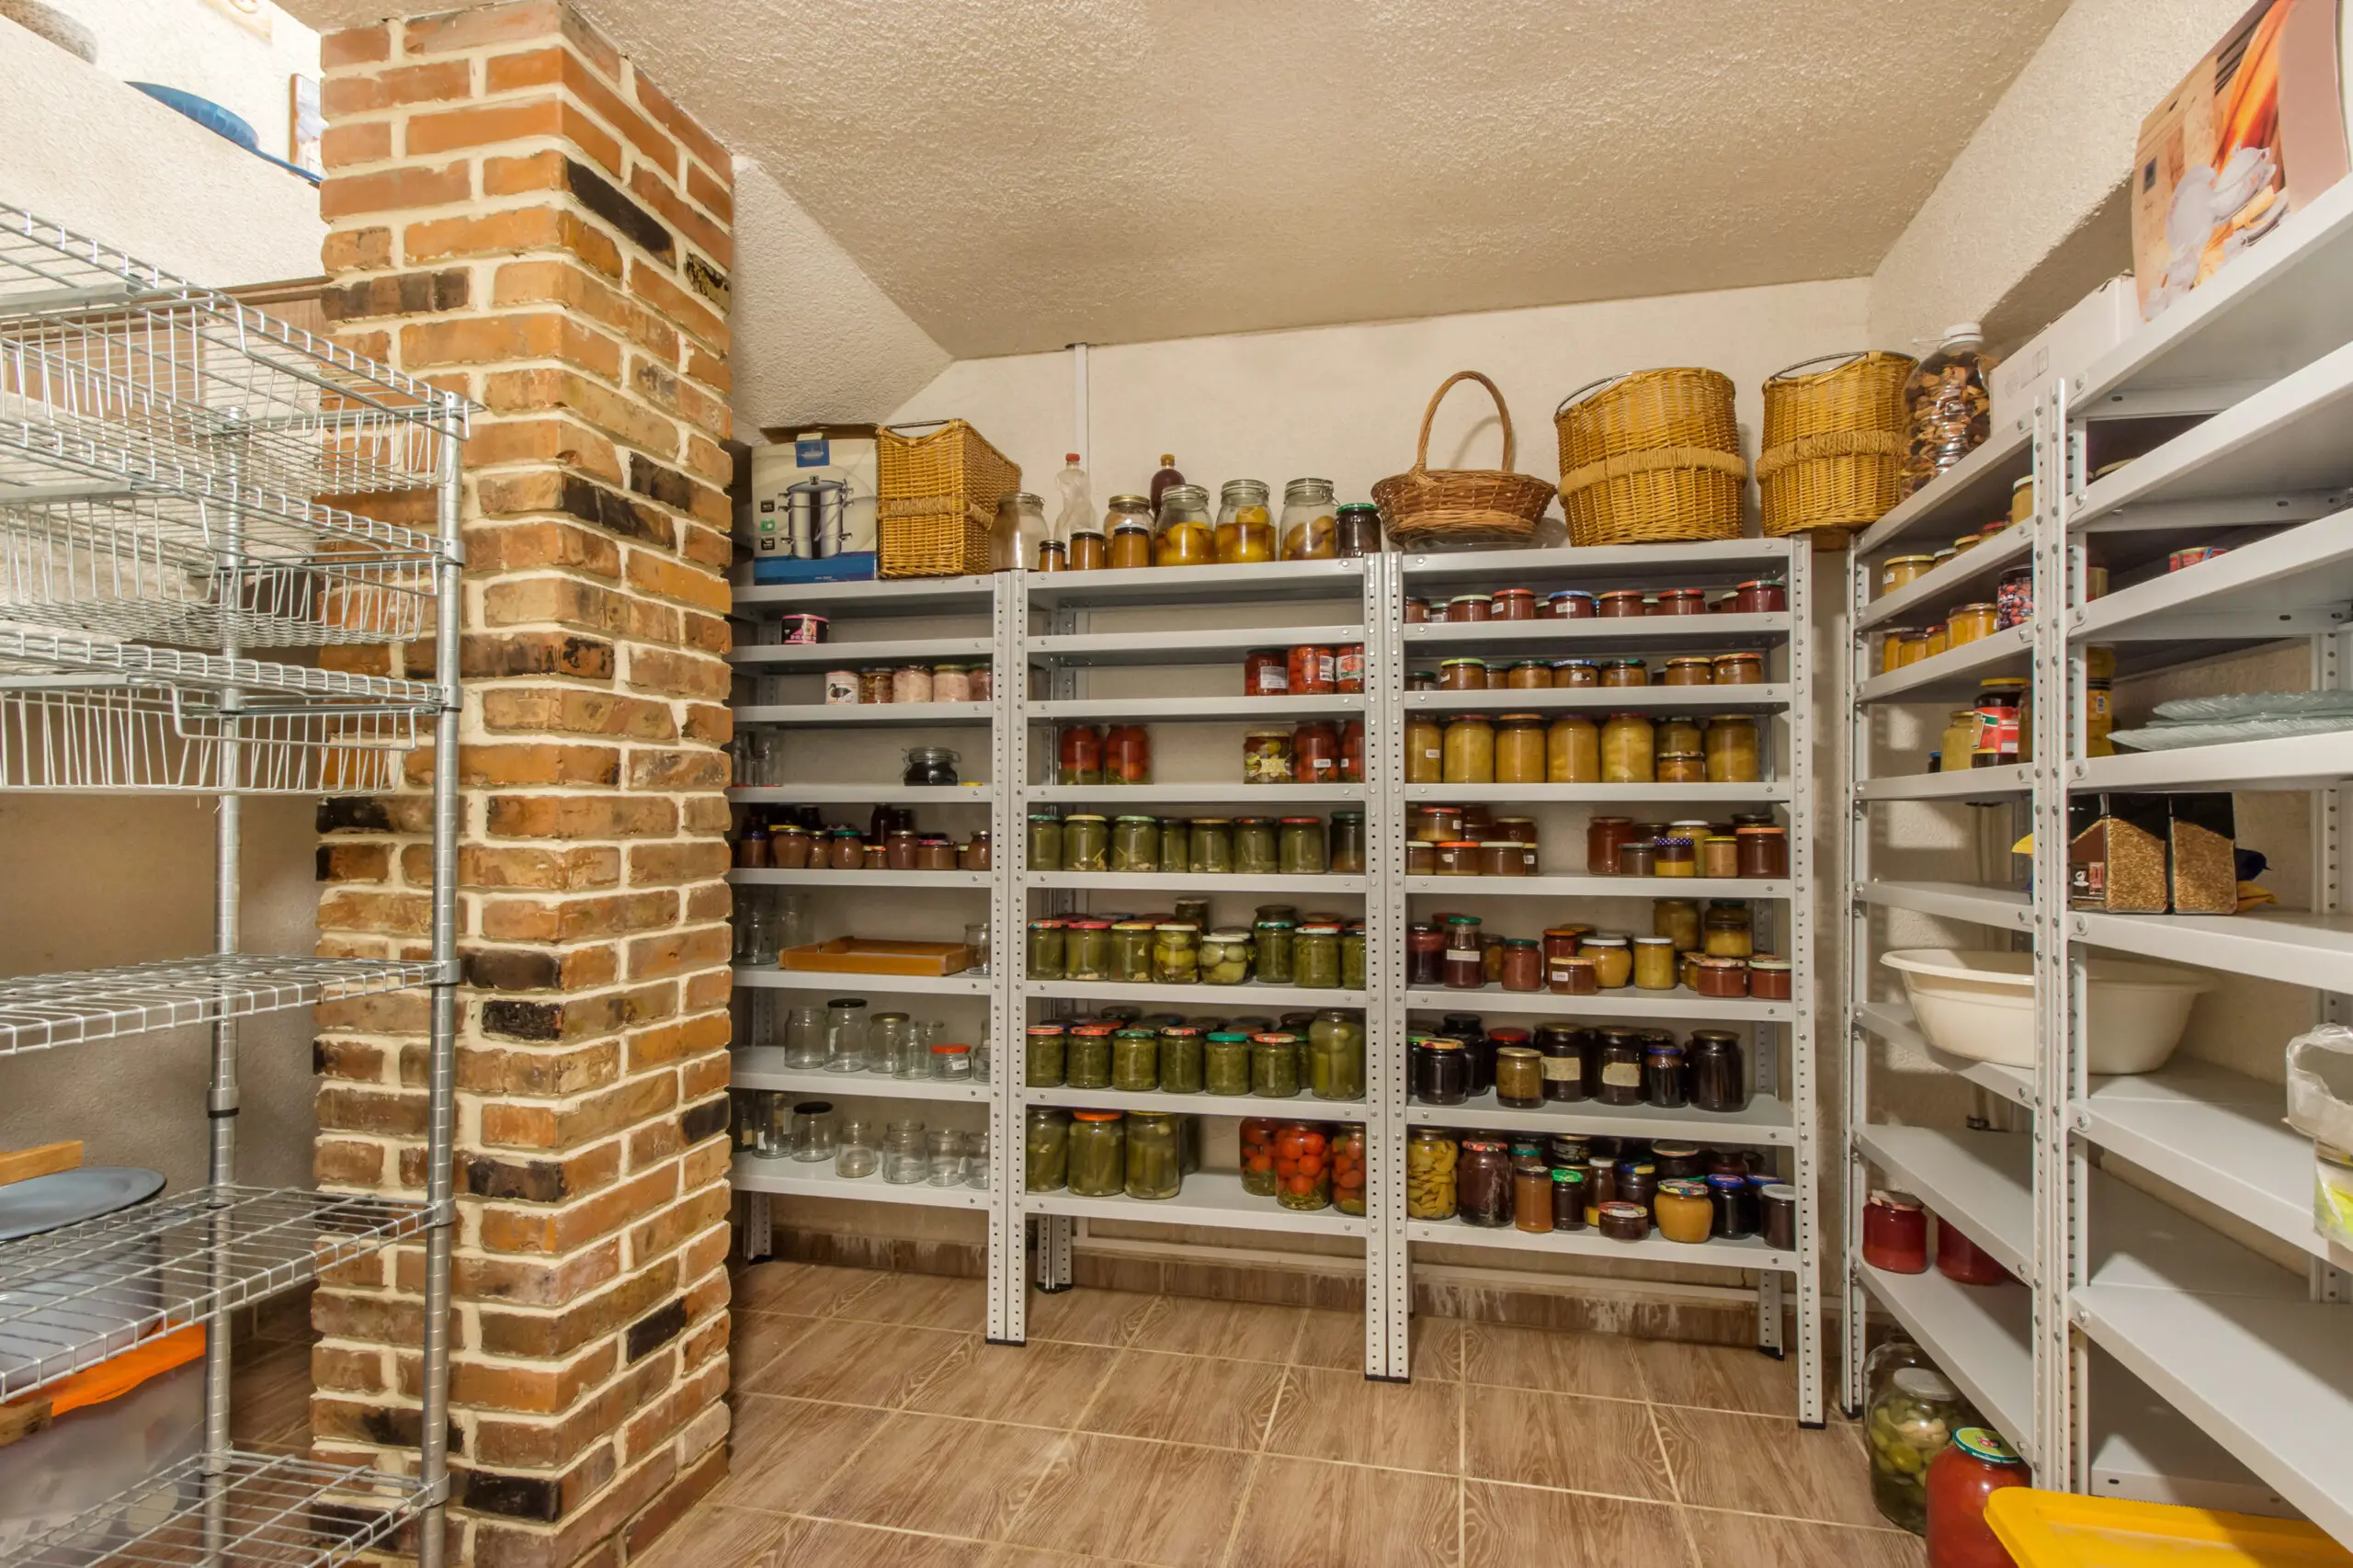
Long-term food storage is an essential aspect of emergency preparedness and self-sufficiency.
For anyone new to food storage, it’s crucial to understand the basic categories of items to include, as well as how to store them properly to ensure their quality and longevity.
In this article, we will discuss six primary categories of food items that should be part of your long-term food storage plan: (1) protein, (2) carbohydrates, (3) cooking fats and oils, (4) herbs, spices, and salt, (5) water and other hydration options, and (6) nice-to-haves or additional items that can enhance the variety and enjoyment of your stored food supply.
To begin with, protein is a vital component of a well-balanced diet, as it provides essential amino acids for building and repairing our bodies’ tissues.
Some examples of protein-rich foods suitable for long-term storage include beans, lentils, canned meats, and freeze-dried meats.
Carbohydrates are also necessary, as they serve as the primary source of energy for our body, and can be stored in the form of grains, pasta, rice, and other shelf-stable options like cereals and crackers.
Cooking fats and oils, such as vegetable oil, olive oil, or coconut oil, are imperative as well, since they add flavor to dishes and allow for proper cooking techniques.
They can be stored in tightly sealed containers, away from light and heat to maintain their quality over time.
Herbs, spices, and salt not only add flavor to your meals but can also have preservation and medicinal properties.
Stocking up on a variety of dried herbs, spices, and different types of salt can provide essential seasoning for your stored foods.
Water and other hydration options are crucial for both drinking and meal preparation, so be sure to have a supply of fresh water, as well as alternatives like sports drinks, powder mixes, or even coconut water.
Lastly, the nice-to-haves category includes items that may not be strictly necessary for survival but can bring much-needed variety, nutritional value, or enjoyment to your food storage plan.
These items can include condiments, canned fruits, and vegetables, or even indulgences like chocolate or candy.
Why Long-Term Food Storage Matters
Long-term food storage is essential for a variety of reasons. It ensures you have a supply of food during emergencies, natural disasters, or unexpected economic downturns.
Properly stored food can provide peace of mind and self-sufficiency in the face of uncertainty.
Having a well-stocked pantry can also help you save money in the long run by allowing you to take advantage of sales and bulk purchases.
Additionally, it can reduce stress as it eliminates the need for frequent grocery shopping trips, which is especially important when dealing with limited mobility or other challenges.
Apart from emergencies and conveniences, long-term food storage plays a crucial role in sustainable living.
By stocking up on non-perishable items, you can reduce waste and decrease your carbon footprint.
This practice encourages responsible consumption and supports local agriculture, especially when storing seasonal produce.
The Six Categories of Long-Term Food Storage
When preparing for long-term food storage, it’s essential to consider a variety of food types to maintain a balanced diet and ensure you have all the necessary nutrients.
This section will briefly discuss six categories of food storage: (1) protein, (2) carbohydrates, (3) cooking fats and oils, (4) herbs, spices, and salt, (5) water and other hydration, and (6) nice-to-haves.
By following these categories, you’ll have a well-rounded food storage plan for any situation.
1. Protein is a crucial nutrient for maintaining muscle mass, repairing tissue, and providing energy. Long-term storage options for protein include canned meats, beans, lentils, and shelf-stable protein powders. Make sure to have a variety of these items in your storage to avoid monotony.
2. Carbohydrates serve as the body’s primary source of energy. Long-lasting carbohydrate options include whole grains, pasta, rice, and various flours. These can be stored in airtight containers to maximize their shelf life.
3. Cooking fats and oils are essential for preparing meals and providing a secondary source of energy. Examples of long-lasting oils include coconut oil, olive oil, and vegetable oil, as well as solid fats like shortening and lard. Be mindful of their expiration dates and store them in a cool, dark place.
4. Herbs, spices, and salt are essential for adding flavor to your meals and preventing boredom. These items typically have long shelf lives, especially when stored in airtight containers. Some common herbs and spices to consider are basil, oregano, thyme, pepper, and curry powder. Don’t forget to include iodized salt for added taste and essential nutrients.
5. Water and other hydration are an often-overlooked aspect of food storage. It’s crucial to store enough water for both drinking and preparing meals. Options include bottled water, water purification tablets, and filters. Additionally, consider stocking up on electrolyte drinks or powdered drink mixes for variety and additional nutrients.
6. Nice-to-haves are not strictly essential but can make your food storage more enjoyable and varied. These items may include comfort foods like chocolate or instant coffee, as well as condiments such as mustard, ketchup, and mayonnaise. Stock up on these items according to your personal preferences and storage space available.
Protein

Protein is an essential macronutrient that plays a vital role in the growth and repair of body tissues.
It is crucial to have a stock of protein-rich foods in your long-term food storage to maintain a balanced diet and ensure your body gets the nutrients it needs.
Options and Sources
There are various options and sources of protein that can be stored in your long-term food storage. These include:
- Canned meats (e.g., chicken, turkey, ham, and tuna)
- Dried and canned beans (e.g., kidney beans, black beans, and chickpeas)
- Lentils and split peas
- Freeze-dried meats
- Textured vegetable protein (TVP) and other meat substitutes
- Protein powders (e.g., whey and plant-based options)
- Nuts and seeds (e.g., almonds, peanuts, sunflower seeds)
Storage Tips and Best Practices
Proper storage is key to maximizing the shelf life of protein sources and maintaining their nutritional value. Here are some storage tips and best practices:
- Store canned meats and beans in a cool, dry, and dark place to protect them from temperature fluctuations and light exposure that could compromise their quality.
- Label and date all items, and practice a rotation system – using the oldest items first – to ensure freshness.
- When storing nuts and seeds, it’s important to use airtight containers to protect them from moisture and pests. Vacuum sealing or nitrogen packing can help extend shelf life further.
- Freeze-dried meats and TVP should be kept in their original packaging or airtight containers, preferably with oxygen absorbers to avoid oxidation and spoilage.
- If using protein powders, keep the container sealed and store it in a cool, dry place away from direct sunlight.
Carbohydrates

Carbohydrates are an essential part of any balanced diet, providing energy and nutritional value to our bodies.
In long-term food storage, there are a few sources of carbohydrates that are particularly shelf-stable and easy to store.
Options and Sources
When considering carbohydrates for long-term food storage, choose options that have a long shelf life and are nutrient-dense. Some excellent options are:
- Whole grains: such as rice, quinoa, barley, and oats.
- Pasta: dry pasta made from wheat or alternative grains like rice, quinoa, or corn.
- Cereals: whole grain cereals, including rolled oats, bran flakes, and muesli.
- Potatoes: dehydrated or freeze-dried potatoes, available as flakes or whole pieces.
- Beans and Legumes: dried beans, lentils, and chickpeas are great sources of carbohydrates, protein, and fiber.
- Flours and Cornmeal: whole grain flours and cornmeal can be used for baking breads, tortillas, and more.
Storage Tips and Best Practices
For preserving the quality and nutritional value of your stored carbohydrates, follow these storage tips and best practices:
- Store in a cool, dry place: heat and moisture can degrade the quality and cause spoilage. Aim to keep the storage area below 70°F and with a humidity level below 15%.
- Use airtight containers: to protect from pests and oxygen exposure, which can oxidize and spoil the food. Use food-grade containers, like Mylar bags or plastic buckets with airtight lids.
- Add oxygen absorbers: this helps to prevent oxidation and spoilage, thus prolonging the shelf life.
- Rotate your stock: practice the first-in, first-out method to ensure food freshness and reduce waste.
- Label and date all containers: this helps you keep track of your inventory and use items within their optimal shelf life.
- Monitor storage conditions: check regularly for pests, temperature, and humidity fluctuations and adjust as needed.
By incorporating these shelf-stable carbohydrate sources and following proper storage practices, you can build a solid foundation for your long-term food storage plan.
Cooking Fats and Oils

When considering long-term food storage, it is important to include cooking fats and oils in your plan.
Fats and oils are essential for cooking, as they add flavor, provide energy, and aid in the absorption of fat-soluble vitamins.
In this section, we will explore various options and sources for cooking fats and oils and discuss storage tips and best practices to ensure they remain fresh and usable over time.
Options and Sources
There are several options for cooking fats and oils that can be stored long-term.
Some popular choices include:
- Vegetable oils, such as canola, olive, or sunflower oil
- Long-shelf-life margarine or shortening
- Coconut oil
- Lard, bacon grease, or other animal fats
- Butter in a can or powdered form
- Avocado oil
When selecting a cooking fat or oil, consider factors such as your dietary preferences, cooking needs, and storage conditions.
Storage Tips and Best Practices
To ensure your cooking fats and oils remain fresh and usable during long-term storage, follow these storage tips and best practices:
- Store fats and oils in a cool, dark, and dry environment to prevent them from becoming rancid. Avoid exposure to sun or heat.
- When possible, choose oils with a high smoke point and longer shelf life, such as coconut and olive oil. These oils can be stored up to two years in some cases.
- Opt for items such as canned butter, powdered butter, or ghee, which have a longer shelf life than regular butter and can be stored without refrigeration.
- For animal fats like lard or bacon grease, store them in airtight containers or canning jars to prevent oxidation and spoilage.
- Rotate your supply of cooking fats and oils regularly to ensure you always have fresh and usable products on hand.
By including a variety of cooking fats and oils in your long-term food storage plan and following proper storage techniques, you can ensure that you have the necessary ingredients to cook flavorful and nutritious meals even in times of emergencies or shortages.
Herbs, Spices, and Salt

Long-term food storage is essential for emergency preparedness or to maintain a well-stocked pantry, but it does not mean the food has to be bland or boring.
Including herbs, spices, and salt in your food storage will not only make the meals more enjoyable but also provide additional health benefits.
Options and Sources
There are numerous options for herbs, spices, and salts suitable for long-term food storage. Here are some commonly used items:
- Dried herbs: basil, oregano, thyme, rosemary, parsley, and more
- Ground spices: cinnamon, paprika, cumin, turmeric, and more
- Whole spices: peppercorns, cloves, allspice, and more
- Salts: iodized table salt, sea salt, Himalayan pink salt, and more
Herbs, spices, and salts can be found in various stores, such as supermarkets or specialty spice shops. For bulk purchasing, consider searching for online retailers or local wholesalers.
Storage Tips and Best Practices
When it comes to long-term storage of herbs, spices, and salts, proper techniques are essential to maintain their quality and flavor. Follow these best practices:
- Store in airtight containers: This will prevent exposure to air, moisture, and light, which can degrade the quality of herbs, spices, and salt.
- Keep in a cool, dark place: High temperatures and direct sunlight can cause herbs, spices, and salt to lose their potency and color. Store them in a pantry or cabinet away from heat sources and windows.
- Label and date the containers: This will help you keep track of the contents and their shelf life. Most herbs and spices can last 2-3 years when stored properly, while salts have an indefinite shelf life.
- Choose whole spices over ground: Whole spices have a longer shelf life than ground spices, as they retain their flavor for longer periods. You can grind them as needed using a spice grinder or mortar and pestle.
Including these flavorful elements in your long-term food storage plan will make a significant difference in the taste and appeal of the meals you prepare during emergencies or everyday life.
Be sure to store them properly for the best results.
Water and Other Hydration

It is crucial to include water and other hydration options in your long-term food storage plans.
Water is essential for survival, and during emergencies or natural disasters, access to clean, safe drinking water may be limited.
In this section, we’ll cover various options and sources for hydration, as well as storage tips and best practices to ensure that you have an adequate supply of water and beverages for an extended period of time.
Options and Sources
Consider a variety of hydration sources when planning your long-term food storage to ensure that you have enough to sustain the needs of your household. Here are some suggestions:
- Bottled Water: Store commercially bottled water, which has a long shelf life and is typically sealed to maintain quality.
- Water Filters and Purifiers: These devices can help ensure that you have access to clean, safe water should your regular sources be compromised. There are various types available, from portable filters to more advanced purification systems.
- Alternative Hydration Sources: Beverages like sports drinks and powdered drink mixes can help provide additional sources of hydration, as well as some nutritional benefits. Additionally, some foods, like fruits and vegetables, are naturally high in water content which can contribute to your daily hydration needs.
Storage Tips and Best Practices
Proper storage of your water and other hydration sources is crucial to ensure their quality and usability when needed. Here are some tips and best practices for storing water and beverages:
- Store in a Cool, Dark Location: Keep your water and hydration supplies in a cool, dark place away from direct sunlight and heat, which can affect the quality and taste of the water.
- Use Proper Containers: Use food-grade water containers designed for long-term storage, or make sure the commercial bottled water is sealed to maintain quality. Avoid using containers that have previously held toxic substances.
- Rotate and Inspect: Periodically check the condition of your stored water and beverages to monitor for any leaks, damage, or contamination. Replace expired or contaminated supplies, and rotate your stock to ensure you always have a fresh supply on hand.
- Know the Shelf Life: Different hydration options have varying shelf lives. Familiarize yourself with the shelf life of each type of beverage you store and plan accordingly to have an adequate supply of potable water when needed.
Nice-to-Haves

Although not essential, having a variety of nice-to-haves in your long-term food storage can enhance your meals and make the experience more enjoyable.
Including items such as indulgent snacks, condiments, and special ingredients can uplift your spirits during difficult times and give you a sense of comfort.
Options and Sources
Consider adding the following items to your nice-to-have list for an extra touch of variety and pleasure:
- Chocolate and other sweets
- Condiments like ketchup, mustard, and mayonnaise
- Pickles, olives, and other jarred items
- Instant coffee, tea, and hot chocolate
- Flavored drink mixes
- Granola bars and other portable snacks
- Canned fruits and desserts
Sources for these items can be your local grocery store, specialty food retailers, or online vendors that specialize in shelf-stable food options.
Be sure to keep an eye on the expiration dates and consume or replace them as needed to maintain freshness.
Storage Tips and Best Practices
Proper storage of your nice-to-haves is important to ensure longer shelf life and maintain their quality. Follow these storage tips to get the best out of your items:
- Keep items in their original packaging if it is suitable for long-term storage, or transfer them to airtight containers such as glass jars or vacuum-sealed bags.
- Store in a cool, dark, and dry place, away from direct sunlight and temperature fluctuations. A pantry, cupboard, or a dedicated food storage room are ideal locations.
- Rotate your nice-to-haves by using the oldest items first and replacing them with new purchases. This ensures that you always have a fresh supply on hand.
- Organize your items by categories or expiration dates for easier inventory management and rotation.
By including some nice-to-haves in your long-term food storage, you can minimize the monotony of meals and add an element of enjoyment in times of need.
Make sure to follow proper storage guidelines to maintain their quality and maximize their shelf life.
Creating a Long Term Food Storage Plan
Start by assessing your available storage space and setting a goal for how long you want your food storage to last.
If you need a hand in calculating how much food you need to store, check out our easy-to-use Food
Storage Calculator.
This can range from a few weeks to several months or even years, depending on your needs and circumstances.
Next, take inventory of your current food supply and identify any gaps in the six main categories.
To help you with this process, here’s a brief overview of each category and some suggested items to include:
| Category | Suggested Items |
|---|---|
| Protein | Canned meats, beans, nuts, seeds, and protein powders |
| Carbohydrates | Rice, pasta, cereals, flour, and canned or dehydrated fruits and vegetables |
| Cooking Fats and Oils | Olive oil, coconut oil, shortening, and butter |
| Herbs, Spices, and Salt | Pepper, garlic powder, onion powder, seaweed, and various herbs and spices |
| Water and Other Hydration | Bottled water, electrolyte powders, and water purification tablets |
| Nice-to-Haves | Condiments, sauces, snacks, and comfort foods |
Once you have a clear understanding of your current food supply and any areas that need improvement, create a shopping list and start purchasing items to fill in the gaps.
Remember to buy foods your family enjoys and rotate your food storage regularly to avoid spoilage.
Lastly, ensure your storage area is cool, dry, and well-ventilated to maximize the shelf life of your long-term food supply.
Label and organize your items for easy access and tracking.
With a well-rounded food storage plan, you’ll be prepared for various scenarios and able to maintain a balanced diet in times of need.
Why You Should Start with 1-Month of Food
Starting with a 1-month supply of food for long-term storage is a practical and achievable goal for beginners.
It ensures that you have enough food on hand in case of emergencies, such as natural disasters, job loss, or other unforeseen events.
This initial step helps you build a strong foundation in food preparedness.
One of the main reasons to begin with a 1-month supply is that it’s less overwhelming than trying to stockpile food for an entire year or more.
By focusing on a manageable time frame, you can learn the basics of food storage, such as proper rotation and organization, without getting discouraged.
Another advantage of starting with a 1-month supply is that it allows you to try out different food items and gradually build a well-rounded pantry.
This way, you can make sure your stored food meets the nutritional needs of your family and takes into account individual preferences and dietary restrictions.
Planning for a 1-month supply is also budget-friendly.
It enables you to slowly add food items to your storage over time, spreading out the cost and reducing the financial strain.
Additionally, when shopping, you can take advantage of sales, bulk discounts, and other opportunities to save money on your food storage items.
In addition to these practical benefits, starting with a 1-month supply helps to build a habit of preparedness in your daily life.
As you become more comfortable with the process, you can gradually expand your food storage to last for longer periods, ensuring that you and your family are always prepared for whatever comes your way.
Tips for Maintaining and Rotating Your Food Storage

Proper maintenance and rotation of your food storage are essential for maximizing its shelf life and ensuring that your stored items remain safe, fresh, and nutritious.
Follow these guidelines to help you manage and organize your supplies effectively.
1. First In, First Out (FIFO) Method: This principle involves using the oldest items in your storage first and replacing them with newer ones. To implement FIFO, label your food items with the date of purchase and place the older items in front of the newer ones. This approach helps minimize waste and ensures that you consume your stored food before it expires.
2. Regularly Inspect Your Food Storage: Periodically check your food storage for signs of spoilage, damage, or infestation. Look for any bulging cans, damaged packaging, or unusual odors. Remove and dispose of any compromised items immediately to prevent contamination of other stored goods. This practice helps maintain the integrity and safety of your food supply.
3. Organize Your Storage Space: Keep your storage area clean, organized, and free from pests. Group food items into your designated categories: protein, carbohydrates, fats and oils, herbs and spices, water and hydration, and nice-to-haves. Store heavier items on lower shelves and lighter items on higher shelves to prevent accidents and make it easier to access the items you need.
4. Maintain Optimal Storage Conditions: To prolong the shelf life of your stored food, maintain a cool, dry, and dark environment. Aim for a consistent temperature between 50°F and 70°F (10°C and 21°C) and keep humidity levels below 60%. Avoid exposing your food storage to direct sunlight, as it can degrade food quality and cause nutrient loss.
5. Reevaluate Your Storage Needs: As your household’s needs and preferences change, it’s important to regularly reevaluate your food storage plan. Make a habit of reviewing your inventory every six months to adjust quantities, remove expired items, and incorporate new products that align with your family’s dietary needs and tastes.
By following these tips and diligently maintaining your food storage, you’ll ensure that it remains safe and accessible, providing you and your family with a reliable supply of nutritious food in times of need.
FAQs
For those new to long-term food storage, you may have some common questions. In this section, we’ll address some of the frequently asked questions to provide you with foundational information on the topic.
What are the ideal storage conditions for long-term food storage?
The optimal storage conditions are a cool, dry, and dark environment, with temperatures around 50-60 degrees Fahrenheit (10-15 degrees Celsius). Keeping foods away from direct sunlight and moisture will help prevent spoilage and degradation of nutritional value. If possible, store your food in airtight, moisture-proof containers to extend their shelf-life.
How long do stored foods typically last?
The shelf-life of stored foods can vary depending on the type of food, packaging, and storage conditions. Typically, long-lasting food items like grains, beans, and canned goods can last for years if stored properly. For instance, dry goods like rice and pasta can last up to 10 years when stored in a cool, dry environment. High-acid canned goods, like tomatoes, have a shelf-life of 12-18 months, while low-acid canned goods, like green beans, can last up to 5 years.
How can I rotate my food storage to maintain freshness and quality?
Using a “first-in, first-out” (FIFO) approach is an effective way to manage your food storage. This means labeling your stored items with dates of purchase, expiration, or both, and using the oldest items first. By regularly consuming and replacing your stored food, you can maintain a high-quality and fresh supply while maximizing shelf-life and reducing waste.
What’s the best way to store water and other hydration options for long-term storage?
Water is crucial to life, and it’s essential to include it in your food storage plan. Plan on having at least one gallon of water per person per day for drinking, cooking, and hygiene. Store water in food-grade plastic containers away from direct sunlight, chemicals, and high temperatures. Additionally, consider stocking up on water purification tablets, portable water filters, and electrolyte solutions to ensure you have enough options for clean and safe drinking water.
Now that you’re more familiar with long-term food storage basics, feel free to explore the other sections of this article for more in-depth information on each category.
Conclusion

In this article, we have covered the essentials of long-term food storage for beginners.
By focusing on six categories: (1) protein, (2) carbohydrates, (3) cooking fats and oils, (4) herbs, spices, and salt, (5) water and other hydration, and (6) nice-to-haves, we hope to have made the process more approachable and manageable.
Proper food storage ensures that you have a reliable supply of nourishment in case of emergencies or unforeseen circumstances.
Storing food long-term requires some planning and organization, but doing so will provide peace of mind, knowing that your family will be well-nourished during any situation.
It’s important to remember that rotating your stored food items is crucial for maintaining their freshness and nutritional value.
Keep track of expiration dates, and regularly incorporate stored foods into your daily meals to ensure they remain fresh, and you maximize their shelf life.
Consider diversifying your food storage to include a variety of options from each category to avoid monotony and provide the necessary nutrients for a balanced diet.
Having a mix of these categories will help support your family’s health and well-being in the long run.
Lastly, proper storage conditions play a significant role in preserving your food’s quality and longevity.
Keep your food storage area cool, dark, and dry to optimize its effectiveness.
Following these guidelines will help ensure that your long-term food storage efforts are efficient and beneficial to you and your loved ones.